Credits

Showing posts with label Blogger. Show all posts

How to Change Simply Background of Blogger Comment Forms

01:26 2 Comments

Earlier, we have been to talking about how to make our blog look more attractive and professional. Changing comment form the size and removing white space that appears below the comment form, were two useful tricks to make your blog comment section look more better. Now, its time to play more with comment form of blogspot. Lets try how to a change blogger comment form background to image or a particular color, and how we can customize blogger comment form.

How to ChangeComment Form Background :

Changing blogger comment form background to an image can add for fun to your blogger and this will make your comment form more attractive. You can also add hover effect which will change comment form background when some one drags the mouse on comment form. Its really very easy to do.


  • How to Customize Blogger Comment Form?
  • Go to your Blogger Account > Dashboard > Template > Edit HTML > Proceed
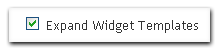
  • Check "Expand Widget Templates" box
  • Search for this code (tip: press CTRL and F at once from your keyboard)

<div class='comment-form'>

Change this code to;

<div id='bablogger-form'>
Good, Now search for this code;
]]></b:skin>
Paste below given code just before the searched code.
#bablogger-form iframe{
background:#ffffff url(https://blogger.googleusercontent.com/img/b/R29vZ2xl/AVvXsEjQTK6TPN0iCpW0h_VGwt7tk39_0u8ksGLtzRxlzxX9bYTYpplAggrKQmYI8ygoQ-_jAwwdWkox7KjxaW8fmAIVPS7i2J2hWj2W46W3NpJvFUN6itxcZh-TgjKN_MMv04gOgoLKA-KTIx3x/s400/plz-do-not-spam1.gif) no-repeat bottom right;
border:7px solid #C7C7C7;
padding:5px;
font:normal 12pt "ms sans serif", Arial;
color:#7EB2AC;
width:450px;
}

  • Save Your template and its done..


You can change the colored link with your any other background image link.

How to Simply Change Mouse Cursors in Blogger

01:21 No Comment

Blogger is very popular free service and is used by millions of people. There are so many bloggers who want to add extra beauty in a blogs and want their blogs to look more attractive and eye-catching. One of the best way to add extra fun to yours blog is, changing mouse cursor on your blog. Changing the mouse cursor in blogger or blogspot blogs is a very easy and you can do this within 1 minute. You can use any kind of image i.e. static or animated as your blog cursor.

  • How To Change Mouse Cursors in Blogger
  • Go to Your Blogger Account > Dashboard > Template > Edit HTML > Proceed
  • Search for this code

]]></b:skin>

  • Paste new code just Before above searched code.
  • body, a, a:hover {cursor: url(http://cursors1.totallyfreecursors.com/thumbnails/checkerflash.gif), progress;}
  • Save Your template and You're done ;)


Note: You can change cursors by changing the line in red (which is cursor file location).

How to Download Free Cursors :

You can download thousands of free cursors from following websites..


Make Free Websites With Unlimited Space and Unlimited Bandwidth

Everyone, now a days, is making websites to earn online money by providing their services. Some of them buy their own web hosting and some use free hosting servers. Its hard to find any tool to create free website online BUT Microsoft Office Live Small Business allows users to create free website. You do not need to have a credit card to sign up or pay them any fee, you don’t event need to purchase a domain name.
 

If were really looking for an easy way to make free websites online so this post will surely make your day because Now you can create free websites with MS Office Live Small Business without any credit card or paypal account. The most useful benefit is that all your files will be hosted on Microsoft servers which are believed to be faster than other hosting servers. You can also share and store documents using Microsoft’s servers.
All the tools and sources will be given to you to design your website with an instruction guide which will help you step-by-step. You will also be able to use Microsoft Site Designer to design your website. You do not need to have any professional or designing skills to create a professional looking website because you get Microsoft Site Designer to help you all the time. You can select a template for your website from a large database of templates. You can customize logo, color combination etc and also can integrate Paypal in that freely created website.
You will get a free website address like www.tenezo.web.officelive.com but you can use your custom domain also like www.tenezo.com but for custom domain, you will have to pay from your pocket.
Features of Microsoft Office Live Small Business
  • Completely Free Website Hosting
  • Unlimited Space and Unlimited Bandwidth (when Microsoft said, simply TRUST)
  • Free Email Accounts
  • Free Templates
  • Easy Customization of Logos and Color Combination
  • Paypal Integration
  • Free Online Support
  • Store or Share any document Online at Microsoft’s Servers
  • Site Traffic Statistics and Domain redirection
The service is currently available only in U.S.A , U.K. , India, Japan, Mexico so if you are in any of these locations but you can create a free website using U.S.A. zip code if you are out of these locations, Just Click Here to create you free website with unlimited hosting and bandwidth by Microsoft. If you are not from these locations or don’t want to use U.S.A location, just wait for some time, Microsoft will surely launch this free service in your country also.

How to Show Full Size Images in Blogger Posts


Normally When you upload a picture/image at Blogger, a small sized (re-sized) picture (thumbnail) is displayed in your blogger post and you and your users have to click on that picture to see full size picture. This hack/trick will let you be able to Upload full size or any fixed size picture in you blog post. Normally
when you any HQ or Large Size picture in Blogger, it will be re-sized and would look like this. 
.
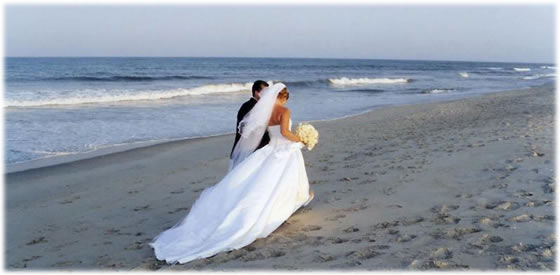
Above Shown picture is 560px × 275px while when i uploaded that picture, blogger re-sized the picture into small picture (400px x 196px) But When you will Use this trick the above upload picture will not be re-sized and the original size of the picture will be displayed in your Blog Post.
.

If you want to show the original size of your Uploaded Picture as i did above, just follow these steps.
First, Calculate what size of a picture you want to display on your blog (in majority of blogs its 560px in width) here we will go with 560px width so that all uploaded pictures who are larger than 560 pixels will be re sized to 560px in width and height will be set automatically. Follow these two steps.

Step# 1

  • Login to Your Blogger Account
  • On Your Dashboard, Click on Layout (see below shown picture for further assistance)
  • Now Click on HTML (see below shown picture for further assistance)
  • Now Search Below Given Code
]]></b:skin>
  • Add this (below given) code Before above given code.
img {
max-width: 560px;
width: expression(this.width > 560 ? 560: true);
}
  • Please Check if the img{ already exist in your template. If exists then simply add above given blue colored lines after img{
  • Save Your Template
  • Step# 1 is completed.

STEP 2

Now, When you Upload any picture in blogger, Just click on Edit HTML tab and you will see a code of you uploaded picture which would like this:
<a onblur=”try {parent.deselectBloggerImageGracefully();} catch(e) {}” href=”https://blogger.googleusercontent.com/img/b/R29vZ2xl/AVvXsEiZw-z2ioggMo7bZU1qt3unGjsMJAZ1IgLNm2wSc9xtTe2ILqcsvTGcEUGj_nXESHOdE8c70ofnntxx2ofO6xbJT21WBjHKbHMXVfAKqd7NZ7o_aCtmAXPlt0a3AfEqtervhvg8Po2dA-sj/s1600-h/Picture.jpg”><img style=”margin: 0px auto 10px; display: block; text-align: center; cursor: pointer; width: 400px; height: 196px;” src=”https://blogger.googleusercontent.com/img/b/R29vZ2xl/AVvXsEiZw-z2ioggMo7bZU1qt3unGjsMJAZ1IgLNm2wSc9xtTe2ILqcsvTGcEUGj_nXESHOdE8c70ofnntxx2ofO6xbJT21WBjHKbHMXVfAKqd7NZ7o_aCtmAXPlt0a3AfEqtervhvg8Po2dA-sj/s400/Picture.jpg” alt=”” id=”BLOGGER_PHOTO_ID_5379789676466610018″ border=”0″ /></a>
Above shown code is a re-sized form of your originally uploaded picture. Now, Just remove the code shown in blue color (width and height size can be different in your case). and replace s400 withs800.
  • Step# 2 is Completed.
  • That’s It!
That was a very unique and most required HACK.

Add a Widget of Top Commentators in Blog Sidebar


Lets encourage your blog commentators by showing their names or nicks in your blog using a widget. This Trick will show top commentators of your blog, the commentators who posted the most comments in your blog. This will encourage you visitors to leave their comments. Follow Below given steps to add a widget to show top comments submitters of your blog.

How to Add a Widget of Top Commentators of Your Blog ?

  • Login to Your Blogger Account
  • On Your Dashboard, Click on Design (see below shown picture for further assistance)
http://img840.imageshack.us/img840/6185/bloggermanu.gif
  • Now Click on Add a Gadget, Use HTML/Javascript Gadget and Place Below Given Code
    <script type=”text/javascript”> function pipeCallback(obj) { document.write(‘<ol>’); var i; for (i = 0; i < obj.count ; i++) { var href = “‘” + obj.value.items[i].link + “‘”; var item = “<li>” + “<a href=” + href + “>” + obj.value.items[i].title + “</a> </li>”; document.write(item); } document.write(‘</ol>’); } </script> <script src=”http://pipes.yahoo.com/pipes/pipe.run?_render=json&_callback=pipeCallback&_id=918c4b96efdf63fee389f2f025085904&EntertheURL=http%3A%2F%2FABC.Blogspot.com&number=10&Nametobeexcluded=Your Name” type=”text/javascript”></script> <div style=”width:1px;height:1px;overflow:hidden”><a href=”http://www.folsol.com”>Blogger Tips</a></div>
  • Save
Make Following Modifications in above given code.

Change ABC.Blogspot.com to Your Blog Address
Change number=10 to Number of Commentators you want to show
Change Your Name to Your Name.
After these modifications, Save Your Javascript/HTML widget and see your blog. This is really very useful and encourage your visitors to submit maximum comments to see their self on your blog

Random Posts Widget for Blogger


Did you ever desired to add a widget with a link to show a random blog post of your blogger/blogspot blog? Here is a way to add some ex  Black Blogger3  Blogger Manu    citement in your blog by adding a Random Post link. Whenever any user will click on that Random Link, your user will be navigated to a random post of your blog.

How to Show Random Posts in Blogger ?

  • Login to Your Blogger Account
  • On Your Dashboard, Click on Design (see below shown picture for further assistance)
  • Now Click on Add a Gadget, Use HTML/Javascript Gadget and Place Below Given Code
<div id=”myLuckyPost”></div> <script type=”text/javascript”> function showLucky(root){ var feed = root.feed; var entries = feed.entry || []; var entry = feed.entry[0]; for (var j = 0; j < entry.link.length; ++j){if (entry.link[j].rel == ‘alternate’){window.location = entry.link[j].href;}}} function fetchLuck(luck){ script = document.createElement(‘script’); script.src = ‘/feeds/posts/summary?start-index=’+luck+’&max-results=1&alt=json-in-script&callback=showLucky’; script.type = ‘text/javascript’; document.getElementsByTagName(‘head’)[0].appendChild(script); } function feelingLucky(root){ var feed = root.feed; var total = parseInt(feed.openSearch$totalResults.$t,10); var luckyNumber = Math.floor(Math.random()*total);luckyNumber++; a = document.createElement(‘a’); a.href = ‘#random’; a.rel = luckyNumber; a.onclick = function(){fetchLuck(this.rel);}; a.innerHTML = ‘View Random Post’; document.getElementById(‘myLuckyPost’).appendChild(a); } </script> <script src=”/feeds/posts/summary?max-results=0&alt=json-in-script&callback=feelingLucky”></script>
  • Save and Its Done !
Above Given Javascript will show a random post link with text View Random Post , If you want to show some other text, just modify the bold text shown in Javascript.

Place Google Adsense in Blogger Post (above and below)


Now a days every blogger is using this common hack or trick of blogger to increase Google Adsense revenue. You can also increase your Google Adsense Earning by placing Google Ads below and/or above Blogger Post. You will be able place Google Ads Above the post (but below the post title) and at the End of Blogger Post. This Hack is only for post pages and not for Homepage of your Blogger Blog. Follow these steps to implement this trick in your blog.
  • Login to Your Blogger Account
  • On Your Dashboard, Click on Design (see below shown picture for further assistance)
  • Now Click on HTML (see below shown picture for further assistance)
  • Now Check the box of Expand Widget Templates (see below shown picture for assistance)
  • Now Search For
<data:post.body/>
  • Place Below Shown Code before and after <data:post.body/> 
<b:if cond=’data:blog.pageType == &quot;item&quot;’>
GOOGLE ADSENSE CONVERTED CODE HERE
</b:if>
  • Save Your Template !
  • Its Done
  • It will looks good and also improve your CTR if you 336×280 Format.

This trick will surely help you to maximize Adsense Earning. I tried my best to explain in easy way but if you face any problem using this trick then discuss your problem in Comments form and i will help you to fix that problem

How to Create a Free Blog with Blogger?


There are several websites giving you a free platform to start your blog and share your thoughts with the world. Blogger.com and WordPress.com are world’s most commonly used blog services. There are many limitations creating a free blog at WordPress.com because you can not install plug-ins, you can not modify or edit WordPress template according to your requirement, You can not monetize your wordpress.com free hosted blog. But in Blogger, you can install widgets, you can edit templates according to your requirements and you can earn some money from your Blogger.com free blog as well. So I will suggest you to go with Blogger. Creating a Blog at Blogger.com is as easy as 123. Just follow these simple steps to create a free Blog using Blogger.com Service.
. 
  • You Will get a form, Just Fill that form and after filling click on Continue
  • Now, Give Your Blog Title and a Blog Address (check availability) and Click on Continue (see below shown picture for assistance)
  • Just Complete Step1, Step2, Step 3 and Step4 as shown in above picture.
  • Now, Its Time to Select a Design for your Blog. Select any Design by clicking on that design and after selecting any design click on Continue
  • Congratulation!!! You Just Have Created Your Blog. Now Just Click on Start Blogging and you are on you way.
  • That’s it!!!
If you face any difficulty creating a free blog using Blogger.com then feel free to discuss with us using Below comments form.

Add Your Picture to Blogger Comments Profile Photo


Today I come to know another little but pretty useful Blogger Feature. Although many of Bloggers know this but it is new for me. Previously, Whenever some one wrote a comment on some Blogger Blog, you could only see a Blogger ICON with your comment you made on blogspot blog. BUT now you can add your picture or some brand logo with your blogger comments.

The Feature is made public i.e. any one can put his/her picture with blogger comment he/she writes. Its easy to Upload your own picture to show with blogger comment. Write Your Comment, click onPreview (as shown in picture below)


After Clicking on Preview, Click on Add Profile picture now just browse and Upload Your picture. Now, that picture will be embedded whenever you post a comment on some blogspot blog. This Picture also will be added to your Blogger Account Picture. You can enable or disable your Blogger Comment Profile Picture from Dashboard>Settings>Comments
 

Website | The content is copyrighted and may not be reproduced on other websites. © | All Rights Reserved 2014

FreshDream Blogger template by Tacni